Have clay soil? Here are some options when building a patio.
Every spring, homeowners across Eagan and Apple Valley discover the same frustrating reality: their beautiful new patio—installed just last year by a budget contractor—now has water pooling on the surface, pavers settling unevenly, and joints separating as the ground beneath shifts and heaves.
These aren't defective pavers. The problem lies beneath the surface, where Minnesota's notorious clay soil creates challenges that separate professional installations from DIY disasters.
After nearly three decades installing patios and hardscapes throughout the Twin Cities metro, Minnesota Landscapes has mastered the art and science of building on clay soil. Our ICPI-certified installation methods—overseen by Operations Manager Rick Morrison—ensure your patio performs flawlessly for decades, regardless of what Minnesota's challenging soil throws at it.
This comprehensive guide reveals exactly why clay soil creates such havoc, what proper professional solutions look like, and how to ensure your patio investment delivers lasting beauty and performance.
Before discussing solutions, you need to understand why Twin Cities clay soil poses such significant challenges for patio installations. This isn't about soil being "bad"—it's about understanding its unique characteristics and designing installations that work with rather than against those properties.
The Clay Soil Reality in Eagan and Apple Valley
The glaciers that retreated from Minnesota thousands of years ago left behind heavy clay soil throughout much of the Twin Cities metro. This soil dominates Eagan, Apple Valley, Rosemount, and extends throughout communities like Woodbury, Cottage Grove, and much of the southern and eastern metro.
Clay soil consists of extremely fine particles—much smaller than sand or silt—that pack tightly together when wet. This creates several problematic characteristics:
Poor drainage represents clay's most obvious challenge. Water moves through clay soil incredibly slowly—sometimes taking days to percolate through areas where sandy soil would drain in hours. This slow movement means water accumulates on the surface or within the upper soil layers, exactly where your patio foundation sits.
Dramatic expansion and contraction occurs as clay absorbs and releases moisture. Wet clay can expand up to 25% in volume, creating enormous pressure beneath hardscapes. As it dries, it contracts and cracks, creating voids and instability. This expansion-contraction cycle repeats constantly, especially during spring when freeze-thaw cycles combine with variable moisture levels.
High plasticity when wet makes clay sticky and difficult to compact properly. Contractors working with wet clay cannot achieve the compaction densities required for stable hardscape foundations. Yet working with clay when it's too dry creates dust and prevents particles from binding together.
Freeze-thaw vulnerability compounds other problems. Water trapped in clay soil freezes during winter, expanding and creating upward pressure called frost heave. This pressure can lift pavers, shift base materials, and destroy even well-built installations that lack adequate depth and drainage.
For homeowners in Mendota Heights, Eden Prairie, or Edina, these challenges affect every outdoor construction project. Ignoring clay soil characteristics leads directly to the settling, cracking, and drainage problems that plague improperly installed patios.
Drive through any established Twin Cities neighborhood and you'll see evidence of failed patio installations: sunken pavers creating trip hazards, wide joint separations where pavers have shifted apart, water pooling on surfaces that should drain, and cracked or spalled pavers stressed by ground movement.
These failures share common causes—shortcuts that save money initially but guarantee expensive problems within just a few years.
Inadequate Excavation Depth
Budget contractors and DIY installations typically excavate only 6-8 inches—adequate for sandy soil but completely insufficient for clay. This shallow depth doesn't extend below the zone where clay experiences the most dramatic expansion and contraction.
Professional installations on clay soil require 12-14 inches minimum depth for patios, and up to 18 inches for driveways or areas with particularly challenging drainage. This depth ensures the paver base sits below the most volatile clay layer and provides adequate thickness for proper base material compaction.
One Apple Valley client called us after their two-year-old patio—installed by a budget contractor—developed severe settling problems. When we excavated to diagnose the issue, we found only 7 inches of total depth. The base material sat directly on clay that expanded and contracted with every rain and dry spell. The patio never had a chance.
Insufficient Base Material and Poor Compaction
Even when excavation depth is adequate, many installations fail because of insufficient base material or inadequate compaction. Clay soil cannot serve as a stable foundation for pavers—it must be replaced with properly compacted crushed stone.
Professional installations include a minimum 6-8 inches of crushed limestone base material (Class 5 or similar), placed and compacted in lifts not exceeding 4 inches each. Each lift must reach 95% compaction density before the next lift is placed. This creates a stable, free-draining foundation that won't shift or settle.
Budget contractors often place base material in thick lifts (6-8 inches) and compact once. This achieves adequate surface compaction but leaves poorly compacted material deeper in the base—material that will settle over time as water infiltrates and compaction gradually occurs under the patio's weight.
We've excavated failed patios where base material appeared adequate in depth, but core samples revealed compaction density below 80% in lower layers. These installations were doomed from day one, regardless of paver quality or installation skill.
Neglected Drainage Systems
Perhaps the most critical failure in budget installations is inadequate drainage design. On clay soil, water doesn't drain naturally downward—it must be actively moved away from the patio through proper grading and dedicated drainage systems.
Professional installations on clay soil include surface grading sloping away from structures at minimum 2% (2 inches of fall per 10 feet of length), edge drains collecting water from the patio perimeter, underground drainage systems moving water to appropriate discharge points, and integration with roof drainage to prevent gutter downspouts from discharging onto or near the patio.
Budget installations typically include only surface slope—and often inadequate slope at that. Without edge drains and underground systems, water accumulates around the patio perimeter, saturating the base material and creating the conditions for freeze-thaw damage and settling.
Missing Geotextile Fabric
Geotextile fabric serves a critical function in clay soil installations that's often overlooked in budget projects. This engineered fabric separates the excavated clay from the crushed stone base, preventing clay migration upward into the base.
Without fabric, fine clay particles gradually migrate into the crushed stone base, filling voids and reducing drainage capacity. Over time, the base becomes contaminated with clay and loses its free-draining characteristics—the foundation literally transforms back into clay soil.
Professional installations include commercial-grade geotextile fabric placed over the excavated clay before any base material is added. This simple addition—costing just a few hundred dollars on typical projects—prevents base contamination that would otherwise require complete patio reconstruction to fix.
Our installation process for clay soil conditions reflects decades of experience and ICPI (Interlocking Concrete Paver Institute) certification through Rick Morrison, our Operations Manager. This certification represents the gold standard for paver installation, ensuring we follow proven methods that deliver long-term performance.
Step 1: Comprehensive Site Analysis and Drainage Assessment
Every project begins with thorough site analysis examining existing drainage patterns, clay depth and characteristics, proximity to structures and required slope directions, location of existing utilities and underground obstacles, and access for equipment and material delivery.
For Eagan properties, this analysis often reveals challenging conditions like nearly flat topography requiring creative drainage solutions, clay depth extending 3+ feet below the surface, proximity to structures limiting slope directions for drainage, and mature trees whose root systems must be preserved.
Our designers—Patrick Erkens and Kelly Bremer—develop exterior design solutions that work with these constraints rather than ignoring them. Patrick's hardscape expertise ensures patio placement and grading optimize drainage, while Kelly's landscape knowledge helps integrate solutions like rain gardens that capture and manage water naturally.
Step 2: Strategic Excavation to Proper Depth
Excavation on clay soil must reach adequate depth while managing moisture conditions. Excavating wet clay creates a muddy mess that's impossible to compact properly. Excavating during drought creates dust and disturbs more soil than necessary.
Our crews time excavation for optimal soil moisture—typically late spring or early summer after the ground has dried somewhat but before summer drought sets in. For projects beginning in fall, we monitor weather closely to avoid working during wet periods.
Excavation proceeds to 12-14 inches depth for typical patio installations, extending to 18 inches in areas with particularly poor drainage or where heavier loads will occur. This depth ensures we've removed the most volatile clay layer and created adequate space for proper base thickness.
Excavated clay is hauled away rather than redistributed on the property. Clay cannot be repurposed effectively in landscaping applications—it must be removed entirely to prevent future drainage problems.
Step 3: Geotextile Fabric Installation
With excavation complete, we install commercial-grade geotextile fabric over the entire excavated area. This fabric extends beyond the patio footprint by at least 12 inches on all sides, ensuring complete separation between clay soil and crushed stone base.
Fabric selection matters. We use non-woven geotextile engineered specifically for soil separation applications, with appropriate strength and permeability characteristics. Big box store landscape fabric lacks the strength and durability required for this critical application.
Overlapping seams by at least 12 inches and securing the fabric to prevent shifting during base installation ensures the separation layer remains intact and functional.
Step 4: Crushed Stone Base Installation and Compaction
Base installation represents the most critical phase for long-term patio performance. This is where ICPI certification and decades of experience differentiate professional installations from amateur work.
We place Class 5 crushed limestone base material in 4-inch lifts, spreading each lift evenly and checking for consistent thickness before compaction. Each lift is compacted using commercial plate compactors (minimum 5,000 lbs of compaction force) until reaching 95%+ compaction density.
Compaction verification happens through observation and testing. Experienced operators recognize properly compacted material by how it responds to the compactor and by checking for "pumping" (base material bouncing rather than remaining firm). On critical projects, we use nuclear density gauges or sand cone testing to verify compaction mathematically.
For typical patios, we install 6-8 inches of base material in two lifts of 3-4 inches each. For driveways or areas expecting heavier loads, we increase total base depth to 10-12 inches, installing in three lifts.
This careful, layered approach to compaction creates a stable foundation that won't settle even under the immense pressures generated by clay soil expansion and contraction. It's why our patios remain level and stable decades after installation while improperly installed patios settle and shift within just a few years.
Step 5: Drainage System Integration
Effective drainage on clay soil requires more than just surface slope—it demands comprehensive systems that actively move water away from the patio and prevent infiltration into the base.
Our drainage systems include:
Surface grading sloping away from structures at 2% minimum. We maintain this slope consistently across the entire patio surface, ensuring water moves toward collection points rather than pooling.
Edge drains installed around the patio perimeter where water accumulation is likely. These perforated pipes surrounded by crushed stone collect water before it can infiltrate the patio base, directing it to discharge points or underground drainage systems.
Underground drainage systems moving collected water to appropriate discharge locations. These might include connections to municipal storm sewers where available, discharge to rain gardens or other landscape features designed to handle water, or daylighting to lower areas of the property where water can dissipate naturally.
Integration with roof drainage ensuring gutter downspouts discharge away from the patio rather than onto it. We often extend downspouts through underground piping to discharge points well away from hardscapes.
For Rosemount and Apple Valley properties with particularly challenging drainage—common in these communities' heavier clay soils—we might recommend additional solutions like French drains collecting water from low areas, rain gardens serving as attractive water management features, and permeable pavers in selected areas to reduce runoff volume.
These comprehensive drainage solutions add cost to installations—typically $2,000-5,000 depending on property conditions and required system complexity. But they're absolutely essential on clay soil. Skipping drainage systems to save money guarantees expensive problems that will cost far more to fix than proper drainage would have cost initially.
Step 6: Bedding Sand and Edge Restraint
With the compacted base and drainage systems complete, we add the final bedding sand layer and install edge restraint systems.
Bedding sand—typically 1 inch of concrete sand—is screeded perfectly level, providing the smooth surface that pavers rest upon. This sand allows for minor adjustments during paver installation while maintaining consistent height.
Edge restraint installation happens before paver placement, using commercial-grade plastic edging secured with 10-inch spikes driven every 12-18 inches. This restraint system prevents horizontal paver movement that would gradually destroy the installation's integrity.
Many failed installations lack adequate edge restraint. Without it, the expansion-contraction forces from clay soil gradually push pavers outward, creating wider joints and increasingly unstable surfaces. Professional edge restraint—properly installed and secured—prevents this movement entirely.
Step 7: Paver Installation and Joint Sand
With all foundation work complete, paver installation proceeds quickly. Our experienced crews place pavers according to the design pattern, maintaining consistent joint spacing (typically 1/8 inch) and ensuring tight fits around edges and obstacles.
After placement, we compact pavers into the bedding sand using plate compactors with protective pads. This compaction seats pavers firmly and locks them together into a unified surface.
Joint sand—polymeric sand for most installations—is swept into joints and compacted. Polymeric sand contains binding agents that harden when moistened, locking pavers together and preventing sand washout and weed growth.
The result is a beautiful, stable patio surface backed by a foundation engineered specifically to handle clay soil's challenges.
While installation method matters most for clay soil success, material selection also affects long-term performance. Not all pavers perform equally in challenging soil conditions.
Concrete Pavers: Belgard and Unilock
Premium concrete pavers from manufacturers like Belgard and Unilock perform excellently on clay soil when properly installed. Their consistent dimensions and engineering ensure they remain stable and level even as the base beneath experiences minor seasonal movement.
Belgard Dimensions and Unilock Umbriano represent premium options combining modern aesthetics with technical specifications designed for challenging conditions. Both products feature compressive strengths exceeding 8,000 PSI and low water absorption rates—characteristics that ensure they won't crack from stresses created by clay soil movement.
For Mendota Heights or Eden Prairie properties where traditional aesthetics matter, Belgard Cambridge Cobble or Unilock Mattoni deliver classic appearance with modern performance.
The key advantage of premium concrete pavers is their engineered consistency. Unlike natural stone—which varies in thickness and characteristics from piece to piece—concrete pavers maintain uniform dimensions that make achieving stable, level surfaces easier even on challenging soils.
Natural Stone Considerations
Natural stone can work beautifully on clay soil, but material selection and installation become even more critical. Stone thickness variations require careful shimming and leveling—challenging work that demands skilled masons.
Bluestone and granite—both relatively consistent in thickness and highly durable—represent the best natural stone choices for clay soil applications. Their density and low porosity provide good freeze-thaw resistance when properly sealed.
Limestone and travertine pose greater challenges on clay soil. Their higher porosity makes them more vulnerable to water infiltration and freeze-thaw damage—problems exacerbated by clay soil's poor drainage characteristics. If using these stones, expect to invest significantly more in drainage systems and plan for regular sealing maintenance.
Permeable Pavers for Ultimate Drainage
For properties with severe drainage challenges, permeable pavers deserve consideration. Products like Belgard's Aqualine Series allow water to drain through the paving surface itself, dramatically reducing runoff and helping manage water where clay soil typically causes accumulation.
Permeable paver installations require modified base systems using open-graded crushed stone that maintains void space for water storage and infiltration. While more expensive than traditional installations, permeable systems solve drainage problems that would otherwise be nearly impossible to address on heavy clay soil.
Theory matters, but real-world results demonstrate our methods' effectiveness. Consider these recent projects where proper clay soil solutions made all the difference.
The Eagan Transformation
An Eagan homeowner contacted us after their three-year-old patio—installed by a budget contractor—developed severe problems. Water pooled constantly on the surface, multiple pavers had settled creating trip hazards, and joints had separated so widely that grass was growing between pavers.
We excavated the failed installation, discovering only 8 inches total depth with minimal base material and no geotextile fabric. The clay soil beneath was saturated and had begun migrating into the base, creating the unstable conditions causing surface problems.
Our solution included proper 14-inch excavation, geotextile fabric installation, 8 inches of properly compacted crushed stone base in two lifts, comprehensive edge drains collecting water from the patio perimeter, surface grading ensuring 2.5% slope away from the house, and new Belgard pavers installed according to ICPI standards.
The transformation was dramatic—and permanent. Four years later, this patio remains perfectly level with no settling, no water pooling, and joints still tight. The homeowner recently called to thank us again, noting they'd recommended us to three neighbors who were experiencing similar problems with their patios.
Apple Valley's Drainage Challenge
An Apple Valley property presented extreme drainage challenges. The lot sits in a low area where water historically accumulated, and gutter downspouts discharged directly onto the proposed patio location. Heavy clay soil throughout the property prevented natural drainage.
Patrick Erkens, our lead designer, developed a comprehensive solution integrating the patio with a rain garden capturing runoff, underground drainage systems moving gutter discharge away from hardscapes, strategic grading directing water to collection points, and permeable pavers in areas where water accumulation was unavoidable.
Installation included 16 inches of excavation to accommodate drainage infrastructure, comprehensive underground piping moving water to the rain garden, 10 inches of crushed stone base providing both structural support and water storage, and edge drains on three sides of the patio collecting any water that might infiltrate.
The finished project transformed an area that was previously unusable much of the year into a beautiful outdoor living space that drains perfectly even during heavy rainstorms. Kelly Bremer's landscape design integrated native plantings in the rain garden that thrive with the water they receive—turning a drainage liability into an attractive landscape feature.
Professional clay soil solutions cost more than budget installations—that's undeniable. Expect to invest approximately 30-50% more for an ICPI-certified installation with proper depth, drainage, and materials compared to a budget contractor's minimum approach.
For a typical 300-square-foot patio, this might mean investing $12,000-15,000 rather than $7,000-9,000. But consider the alternative:
Budget installations on clay soil typically fail within 3-5 years, requiring complete reconstruction. This reconstruction costs as much as the original installation—often more because existing pavers are usually unsalvageable and removal adds labor costs. Total cost becomes $14,000-18,000 for a patio that already failed once and caused years of frustration.
Professional installations cost $12,000-15,000 but deliver 30+ years of trouble-free performance. The lifetime cost per year is dramatically lower, and you never experience the frustration of watching your investment fail prematurely.
One Woodbury client summed it up perfectly: "I'm not rich enough to do this twice. I need it done right the first time." That's exactly the mindset that leads to successful projects on clay soil.
Clay soil doesn't just affect patios—it impacts every aspect of your outdoor space. A comprehensive approach addresses drainage throughout your property, creating solutions that work together rather than fighting against each other.
Tree Services and Root Systems
Mature trees on clay soil properties often struggle with poor drainage and compacted soil. Our tree service team—led by ISA-certified arborists—evaluates how trees interact with soil conditions and recommends improvements.
Sometimes problematic trees should be removed before patio construction, opening space and eliminating roots that would otherwise interfere with proper excavation and base installation. Other times, strategic pruning or root management allows trees to remain while accommodating construction.
Landscape Design Integration
Kelly Bremer's landscape designs often incorporate solutions that help manage clay soil drainage naturally. Rain gardens, berms directing water flow, strategic plantings in low areas that tolerate moisture, and permeable pathways reducing runoff volume all contribute to comprehensive drainage management.
This integrated approach means your exterior design doesn't just look beautiful—it actually improves your property's functionality by addressing drainage challenges holistically.
Lighting Considerations
Clay soil affects even landscape lighting installation. Underground wiring must be properly protected from moisture intrusion, and fixture bases must be installed with drainage considerations to prevent water accumulation around electrical components.
Our lighting installations include sealed wire connections, conduit systems protecting wiring from moisture, and fixture mounting designed for long-term stability even in clay soil conditions.
Even properly installed patios on clay soil benefit from basic maintenance ensuring continued performance:
Annual Inspection checking for any settling or movement, ensuring drainage systems remain clear and functional, looking for joint sand erosion requiring replenishment, and verifying edge restraint remains properly secured.
Joint Sand Maintenance topping off joints where sand has eroded (typically every 2-3 years), and ensuring polymeric sand remains effective at locking pavers together.
Drainage System Maintenance cleaning edge drains annually to prevent clogging, flushing underground pipes if leaf debris accumulation is suspected, and ensuring discharge points remain clear and functional.
Seasonal Consideration avoiding heavy snow removal equipment that could damage pavers, using calcium chloride ice melt rather than rock salt (less damaging to pavers and plants), and watching for any frost heave after severe winters.
These simple maintenance tasks take minimal time but ensure your installation continues performing flawlessly for decades.
Addressing clay soil challenges requires expertise that only comes from decades of experience and professional certification. Our team brings both.
Rick Morrison's ICPI certification demonstrates mastery of installation techniques proven to deliver long-term results. Patrick Erkens and Kelly Bremer provide design expertise ensuring your patio works with your property's unique characteristics rather than fighting against them.
Together, our team has solved clay soil challenges on hundreds of Twin Cities properties. We've seen every possible condition and developed solutions that work reliably regardless of how challenging your specific situation might be.
If you're planning a patio installation on clay soil—or if your existing patio shows signs of the settling and drainage problems that plague improperly installed hardscapes—contact Minnesota Landscapes for a professional assessment.
Call 651-457-0000 or email info@minnesotalandscapes.com to schedule your complimentary consultation. We serve homeowners throughout the Twin Cities metro including Eagan, Apple Valley, Rosemount, Woodbury, Cottage Grove, Mendota Heights, Eden Prairie, Edina, White Bear Lake, Shoreview, Dellwood, Afton, Mendota, Minneapolis, and St. Paul.
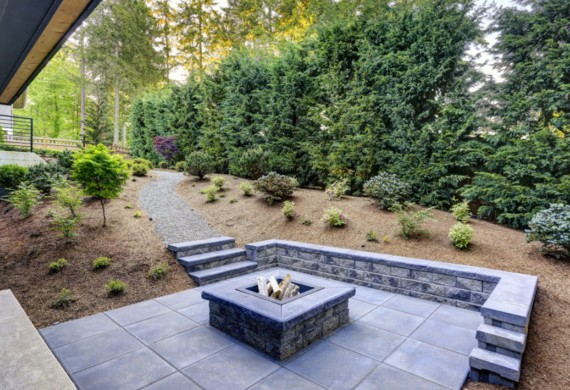
Visit our Projects Gallery to see examples of successful installations on challenging clay soil, or explore our comprehensive Paver and Patio Services to learn more about our ICPI-certified installation process.
Don't let clay soil prevent you from enjoying a beautiful, functional patio. With proper design and professional installation, even the most challenging soil conditions can support outdoor spaces that perform flawlessly for decades.
